DIY USB MIDI footswitch mark II
In 2020, I made a Teensy-based USB MIDI footswitch for controlling my MPC One.
However, the Teensy 2.0 is no longer available, so when someone asked me about making a couple for them, I decided that it was time to port the code to something newer, and the obvious candidate was the capable and very cheap Raspberry Pi Pico.

Mark II footswitches
I also took the opportunity to improve the hardware design. One of the hardest and most tedious parts last time was filing out a rectangular hole for the USB connector. This time, I skipped that by designing a 3D-printed bezel that allows me to drill some round holes (a matter of seconds with a stepper bit) and end up with a tidier result.
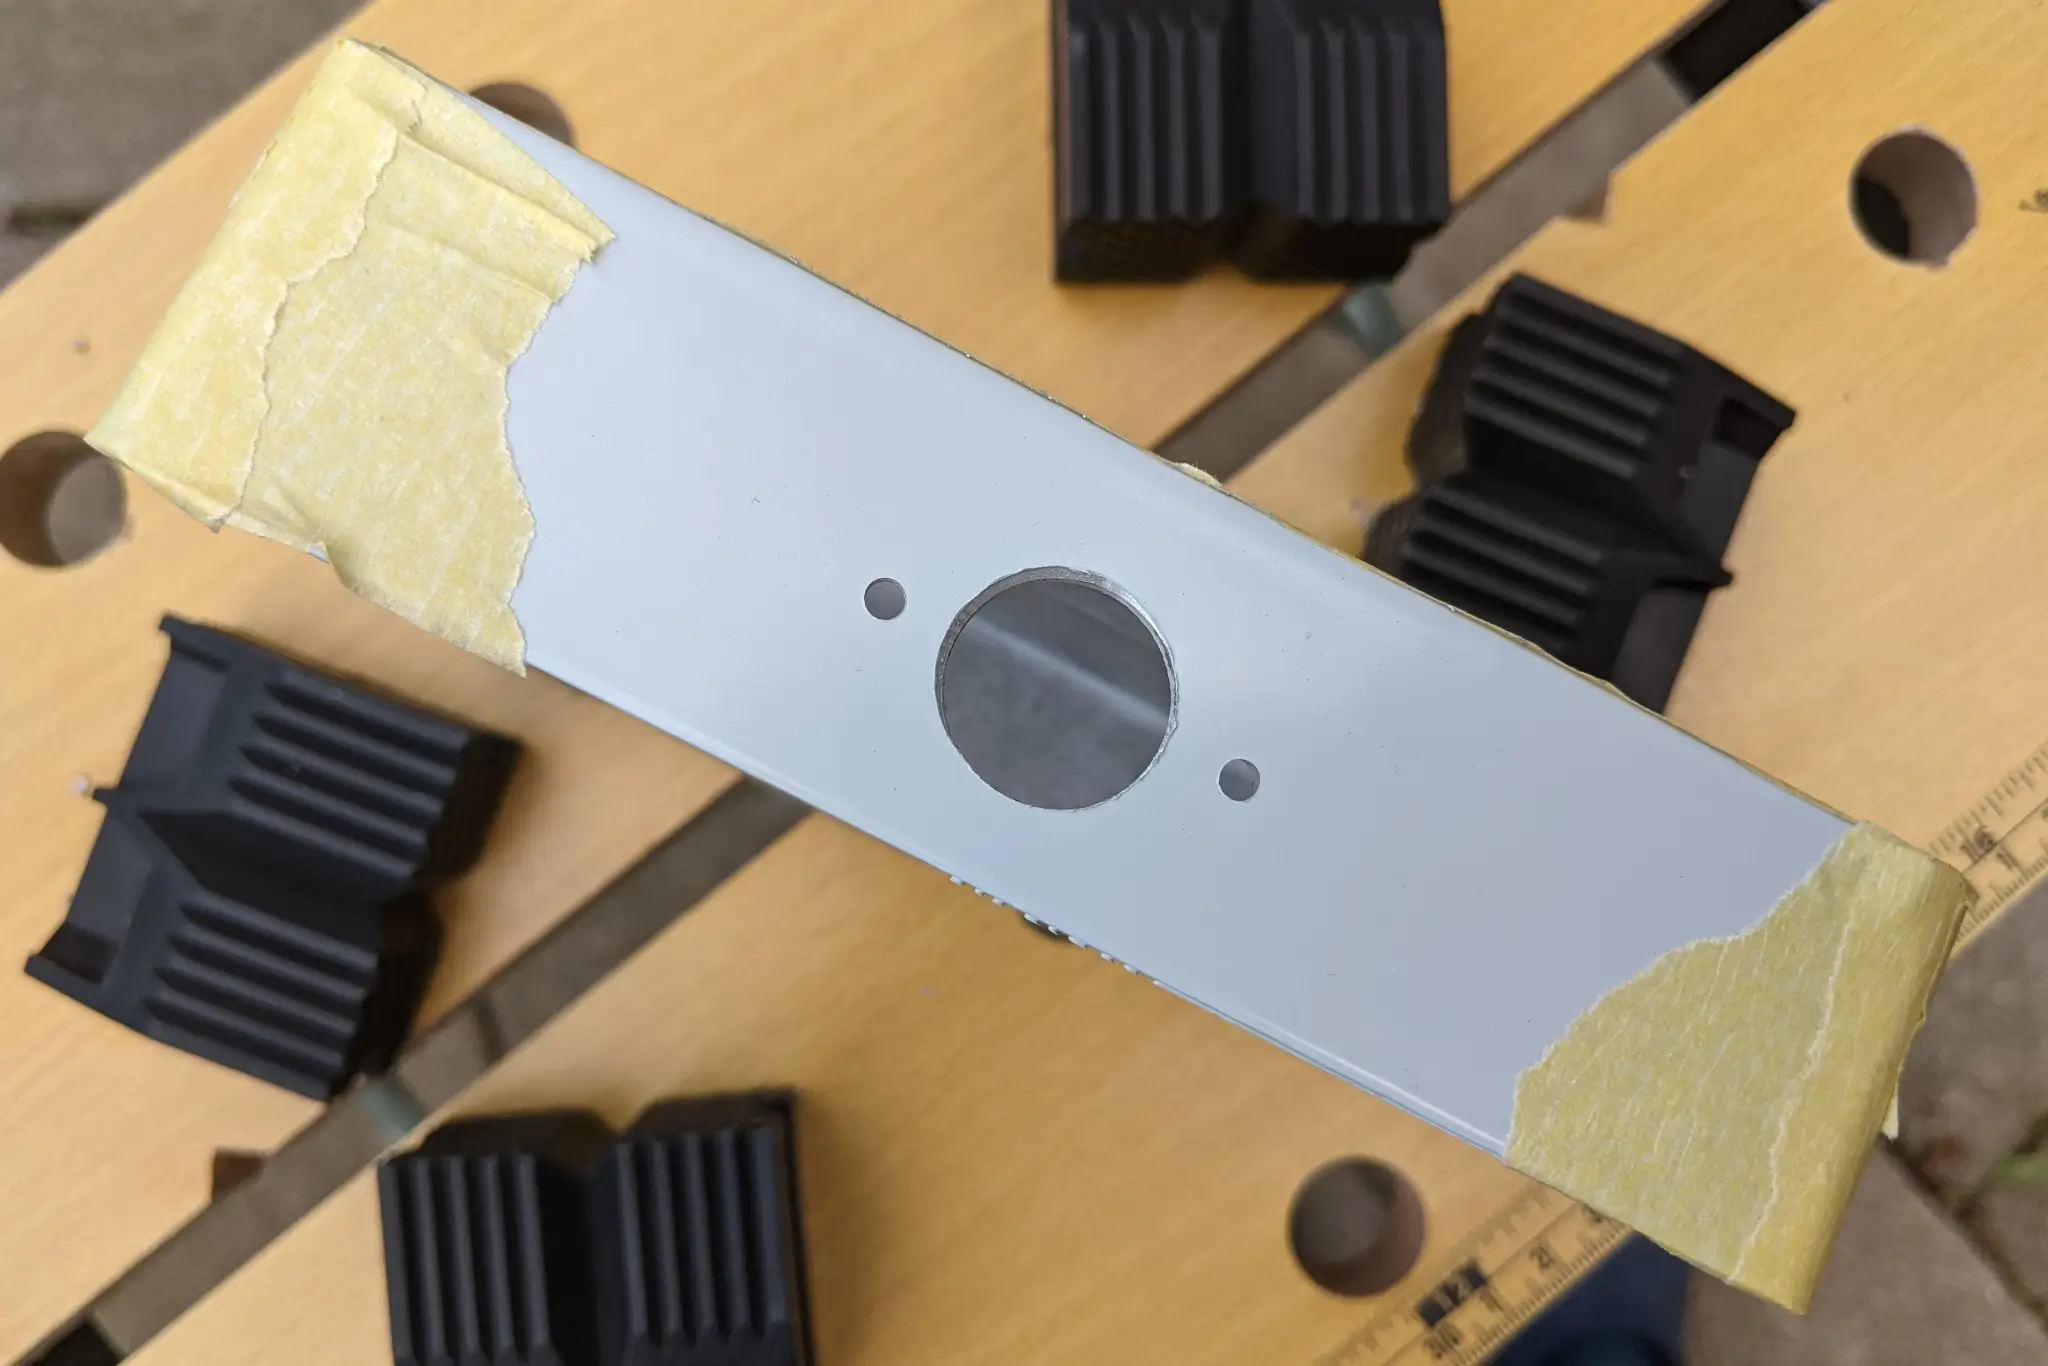
Drilled for the USB bezel
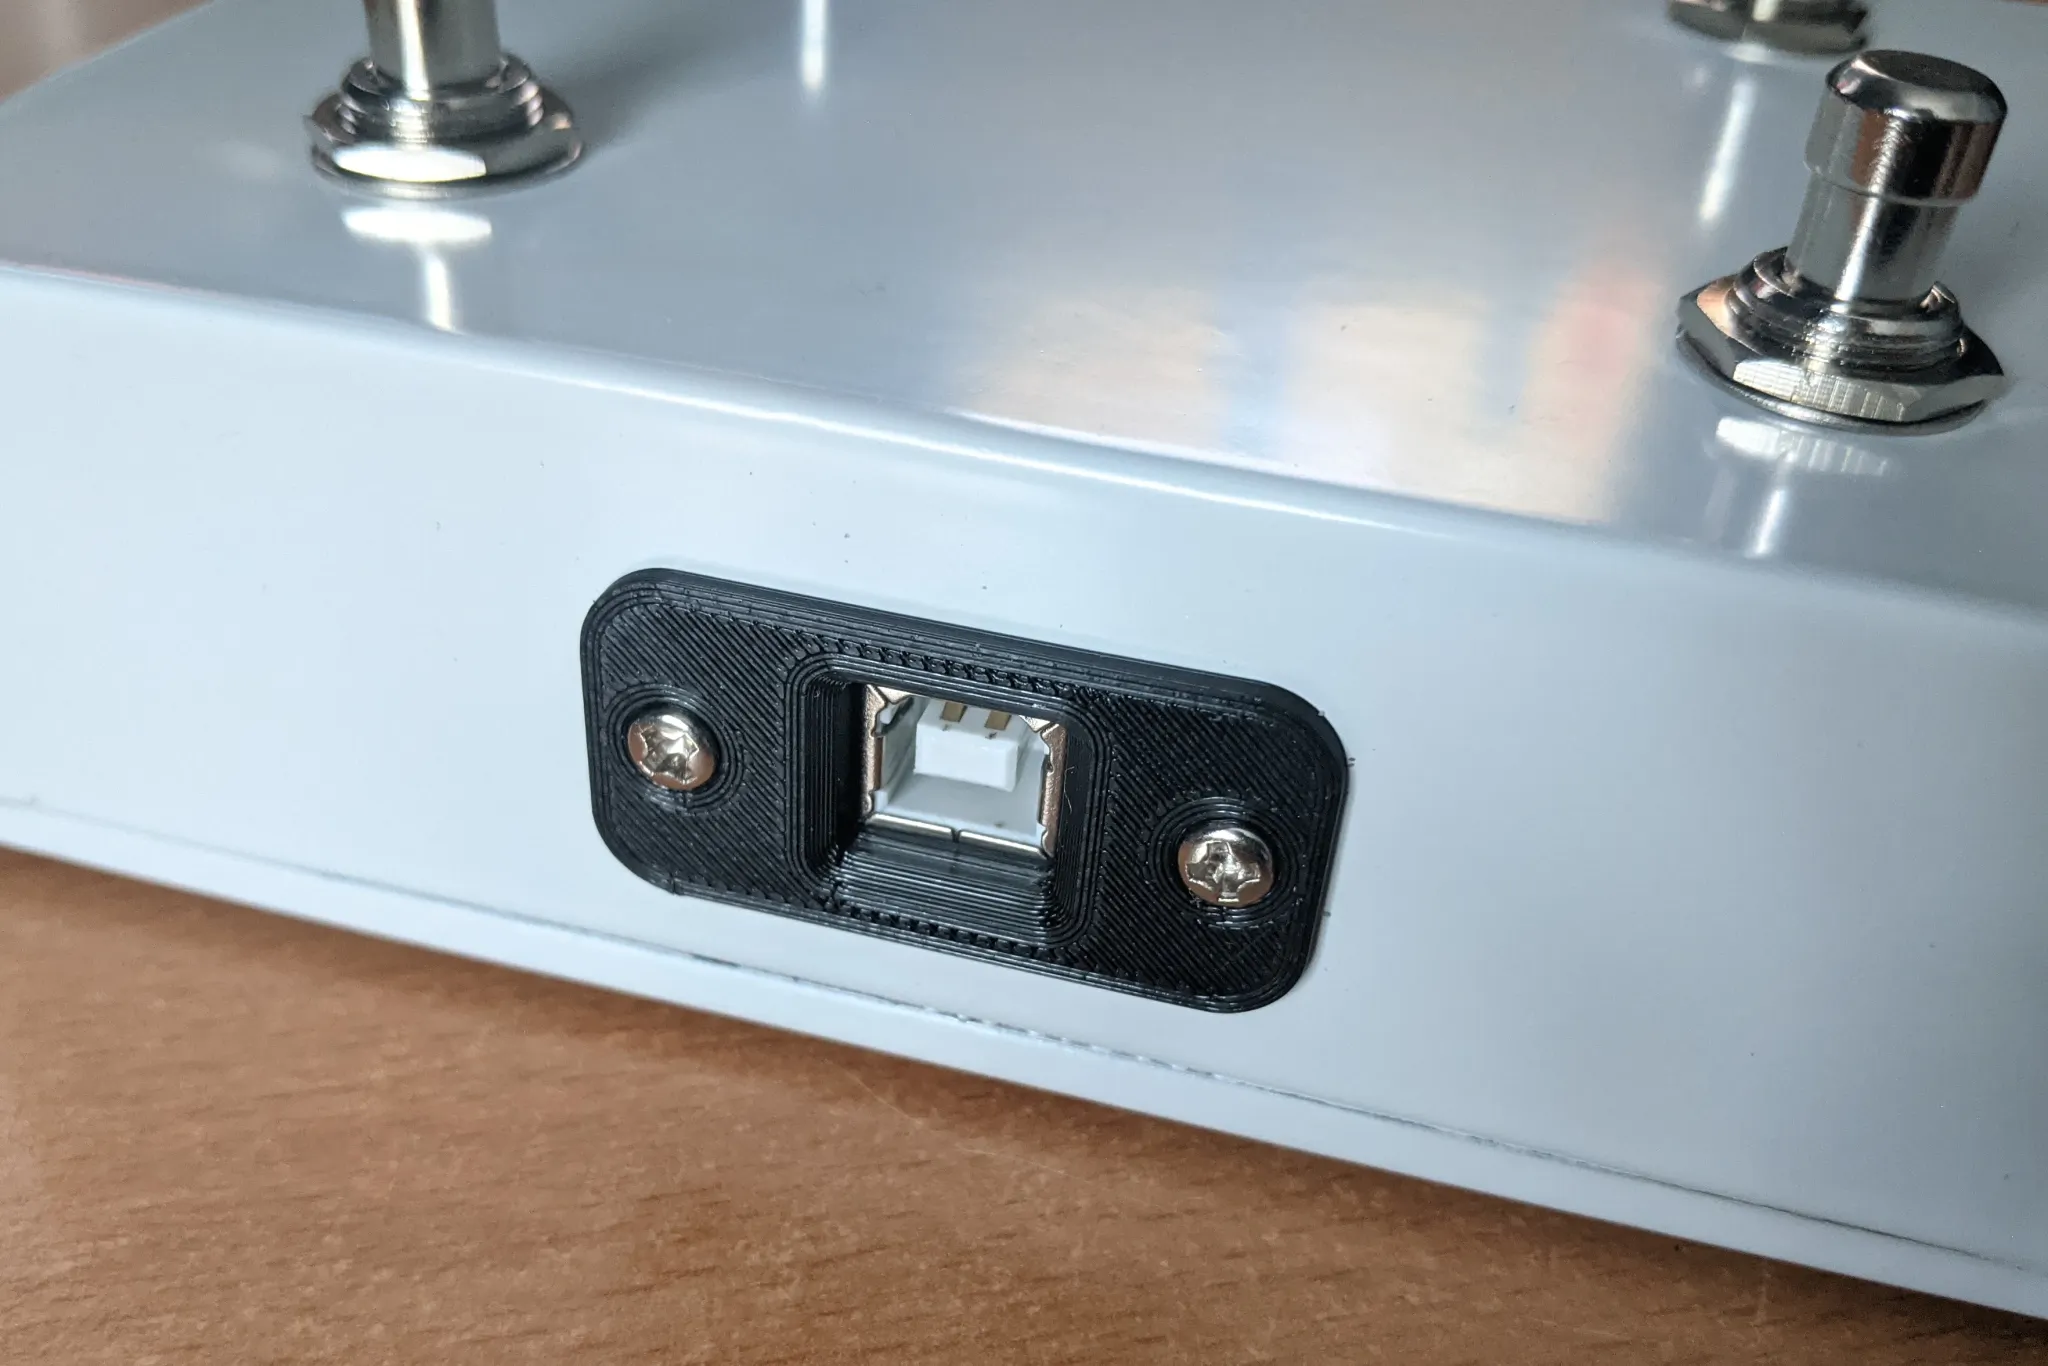
The fitted bezel
To mount the microcontroller, I designed a bracket supported by the switch shafts to which the microcontroller can be screwed by its convenient mounting holes. It’s very skeletal because I optimised the design to print fast.
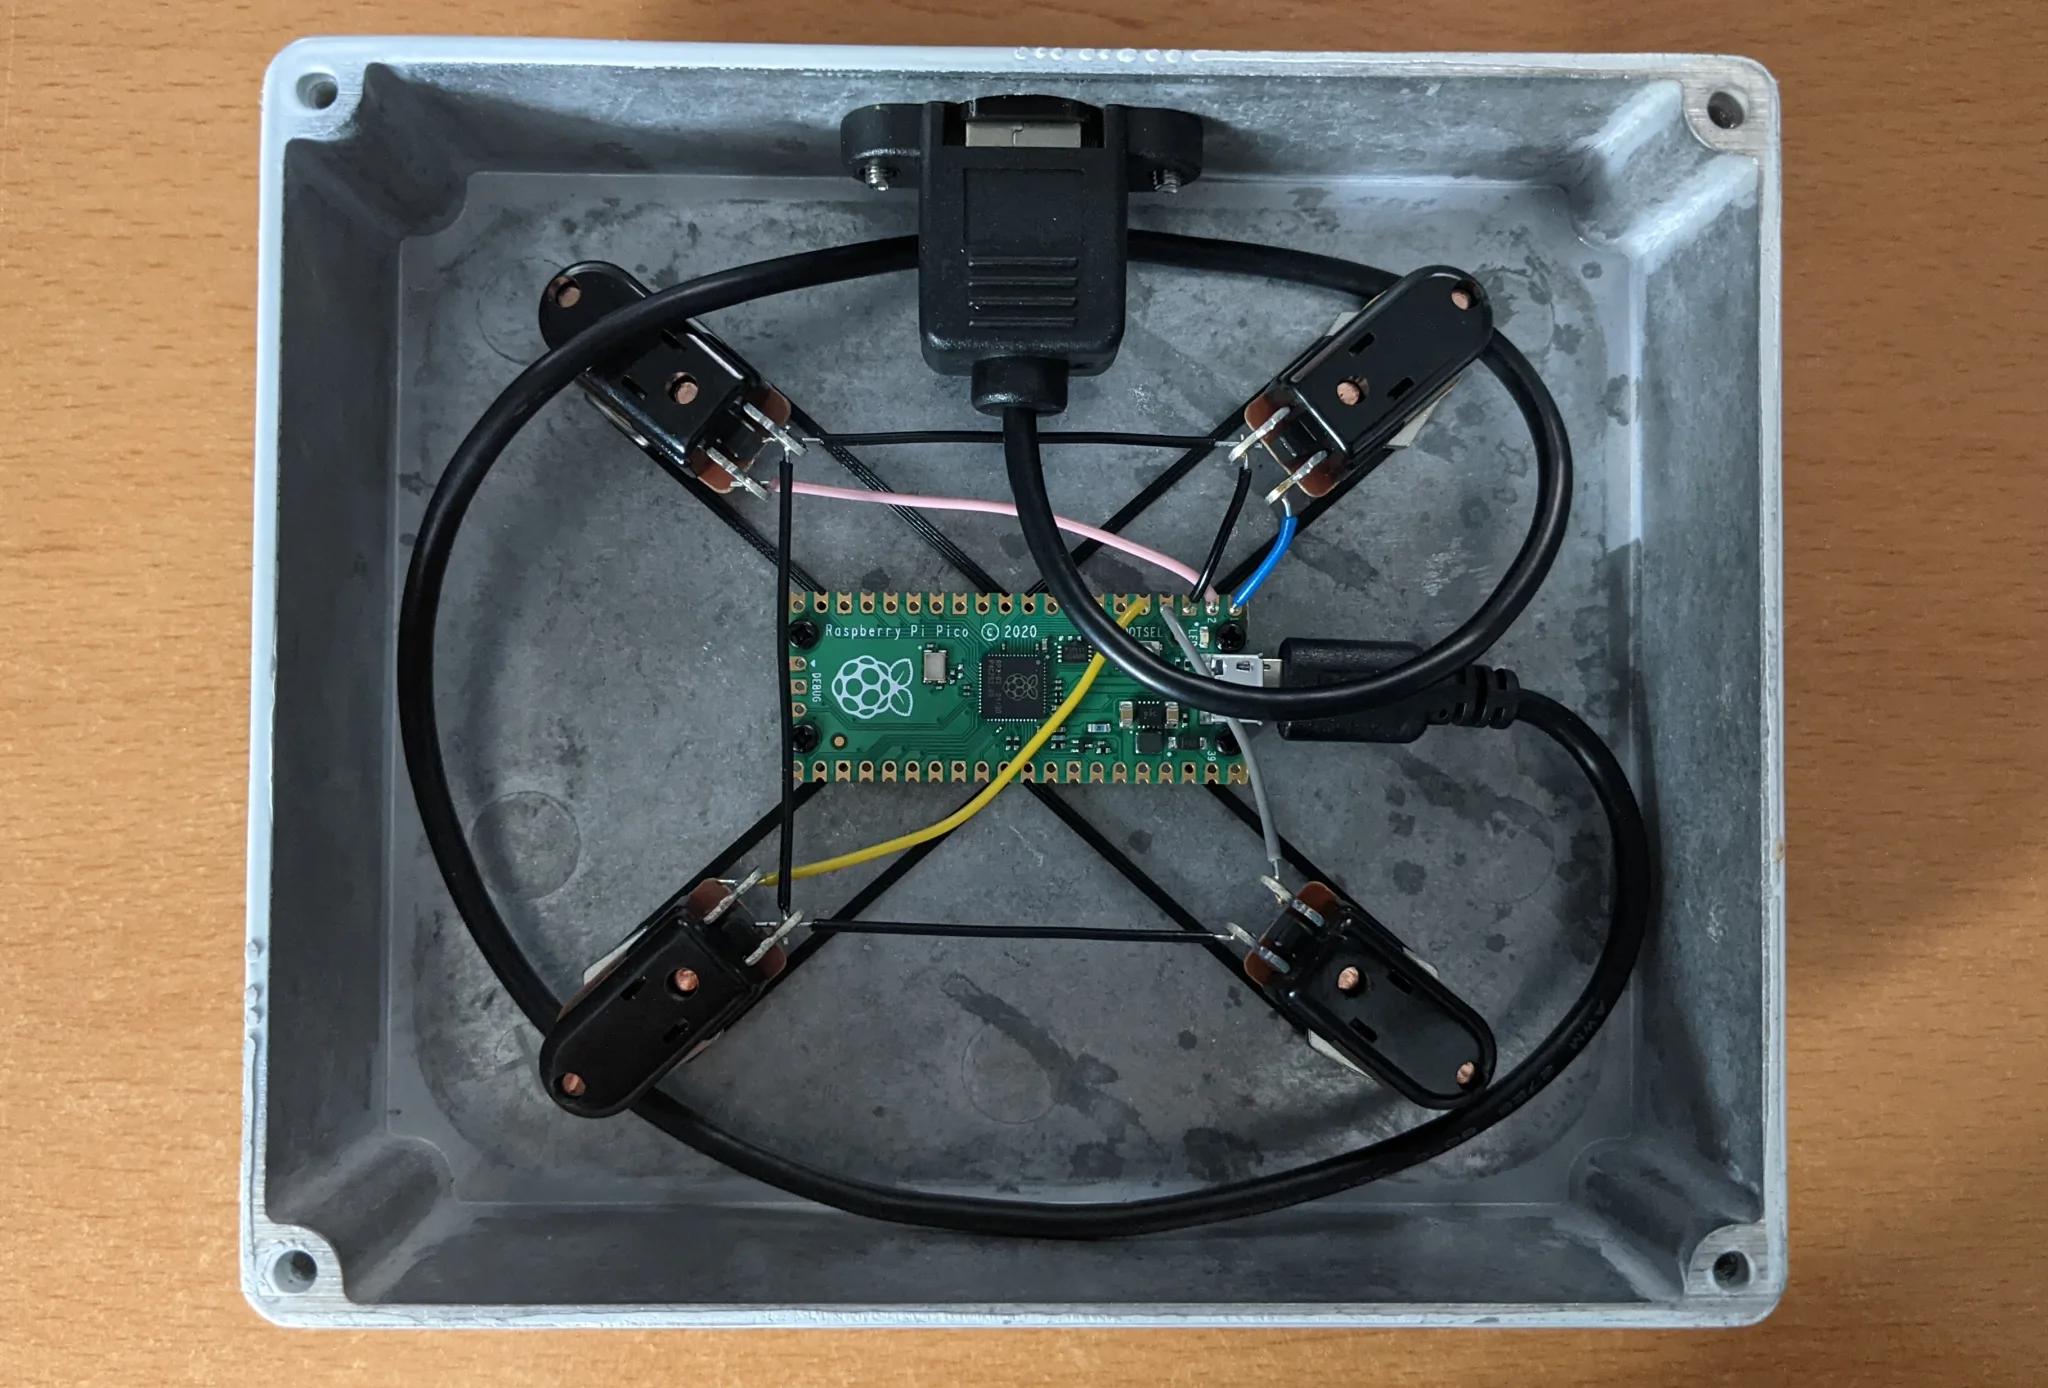
Mounting the Pico board
Software was a bit more of a challenge. Initially, I ported the code using PlatformIO and the Arduino framework. I enjoy using PlatformIO’s command-line tools, and the porting went very quickly.
However, while the resulting implementation worked perfectly on my computer, the MPC wouldn’t recognise it at all. Like my development machine, the MPC runs Linux internally, so this surprised me.
I carried out some tests with the Raspberry Pi SDK to establish that it would work with the MPC, and ported my code using a platform-independent debouncing library in place of the Arduino-specific one.
Once again, it worked on a computer, but not on the MPC One, even though a simple demo project using the same libraries was recognised perfectly, as I knew because I had tested that before going to the trouble of porting.
After many hours of tweaking minimal examples, I found the problem: the name was too long. As far as I can tell, USB product name strings can be up to 31 characters long, but the MPC didn’t like anything longer than 10. I’m not sure that this is the bottom of the problem, but it was enough to get it working.
The updated code and 3D models can be found in the same repository as before.
Thanks to Tom Armitage for his convenient version of the TinyUSB MIDI example tweaked for the Pico, which saved me a lot of time, and to Emmanuel Maschas for the pull request that helped me get it working with the current SDK.