Repairing a detached mandolin brace, laparoscopically
I picked up an Ibanez A-style mandolin with a collapsing top. I guessed that this would be due to a detached brace, and I’d seen a video of someone performing a repair via the f-hole, so I thought I’d try the same. It’s nothing fancy, just a plywood top, but that means that there’s no point paying a professional to repair it, and it’s ideal for me to have a go.
Mandolins with f-holes are usually braced with two bars that start on each side of the neck, and diverge towards the tail, as show in this diagram:

A-style mandolin bracing, shown in red
With a dentist’s mirror, I was able to confirm my initial diagnosis. I was a bit luckier than in the video above, because mine had become detached at the neck end, where it’s much closer to the hole.
I bought a cheap USB “endoscope” for £8. This came with a QR code to sideload a questionable Android application. I did not do this. Instead, I plugged it into my Linux computer, opened Cheese, and used it as a regular webcam.
The camera wouldn’t really be much use as an endoscope, as it can’t focus closer than about 3 cm from the lens, but it’s perfect for seeing inside a musical instrument while working it, and for taking low-resolution photos of the inside.
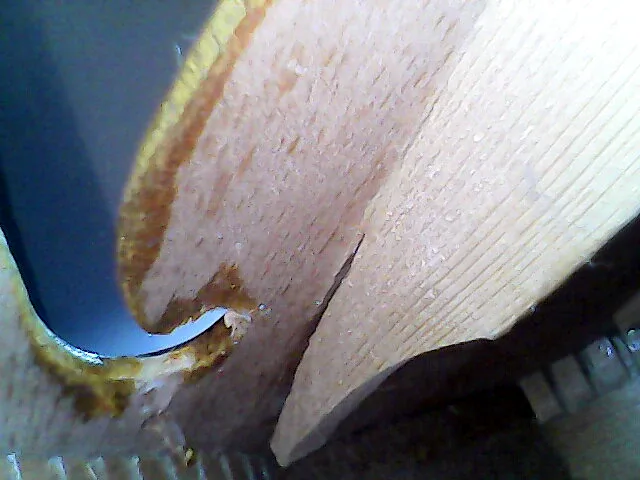
Partially detached brace
Using FreeCAD and my 3D printer, I modelled and printed a clamp that could fit through the f-hole and clamp the end of the brace in place. I used a bolt and threaded dowel (as used to assemble flat-pack furniture) to apply force, and printed jaws to fit on each end. Finally, I glued thin cork onto the jaw faces. This wasn’t a perfect clamp, because it required some effort to keep the jaws aligned while tightening, but it fit through the gap and was strong enough.
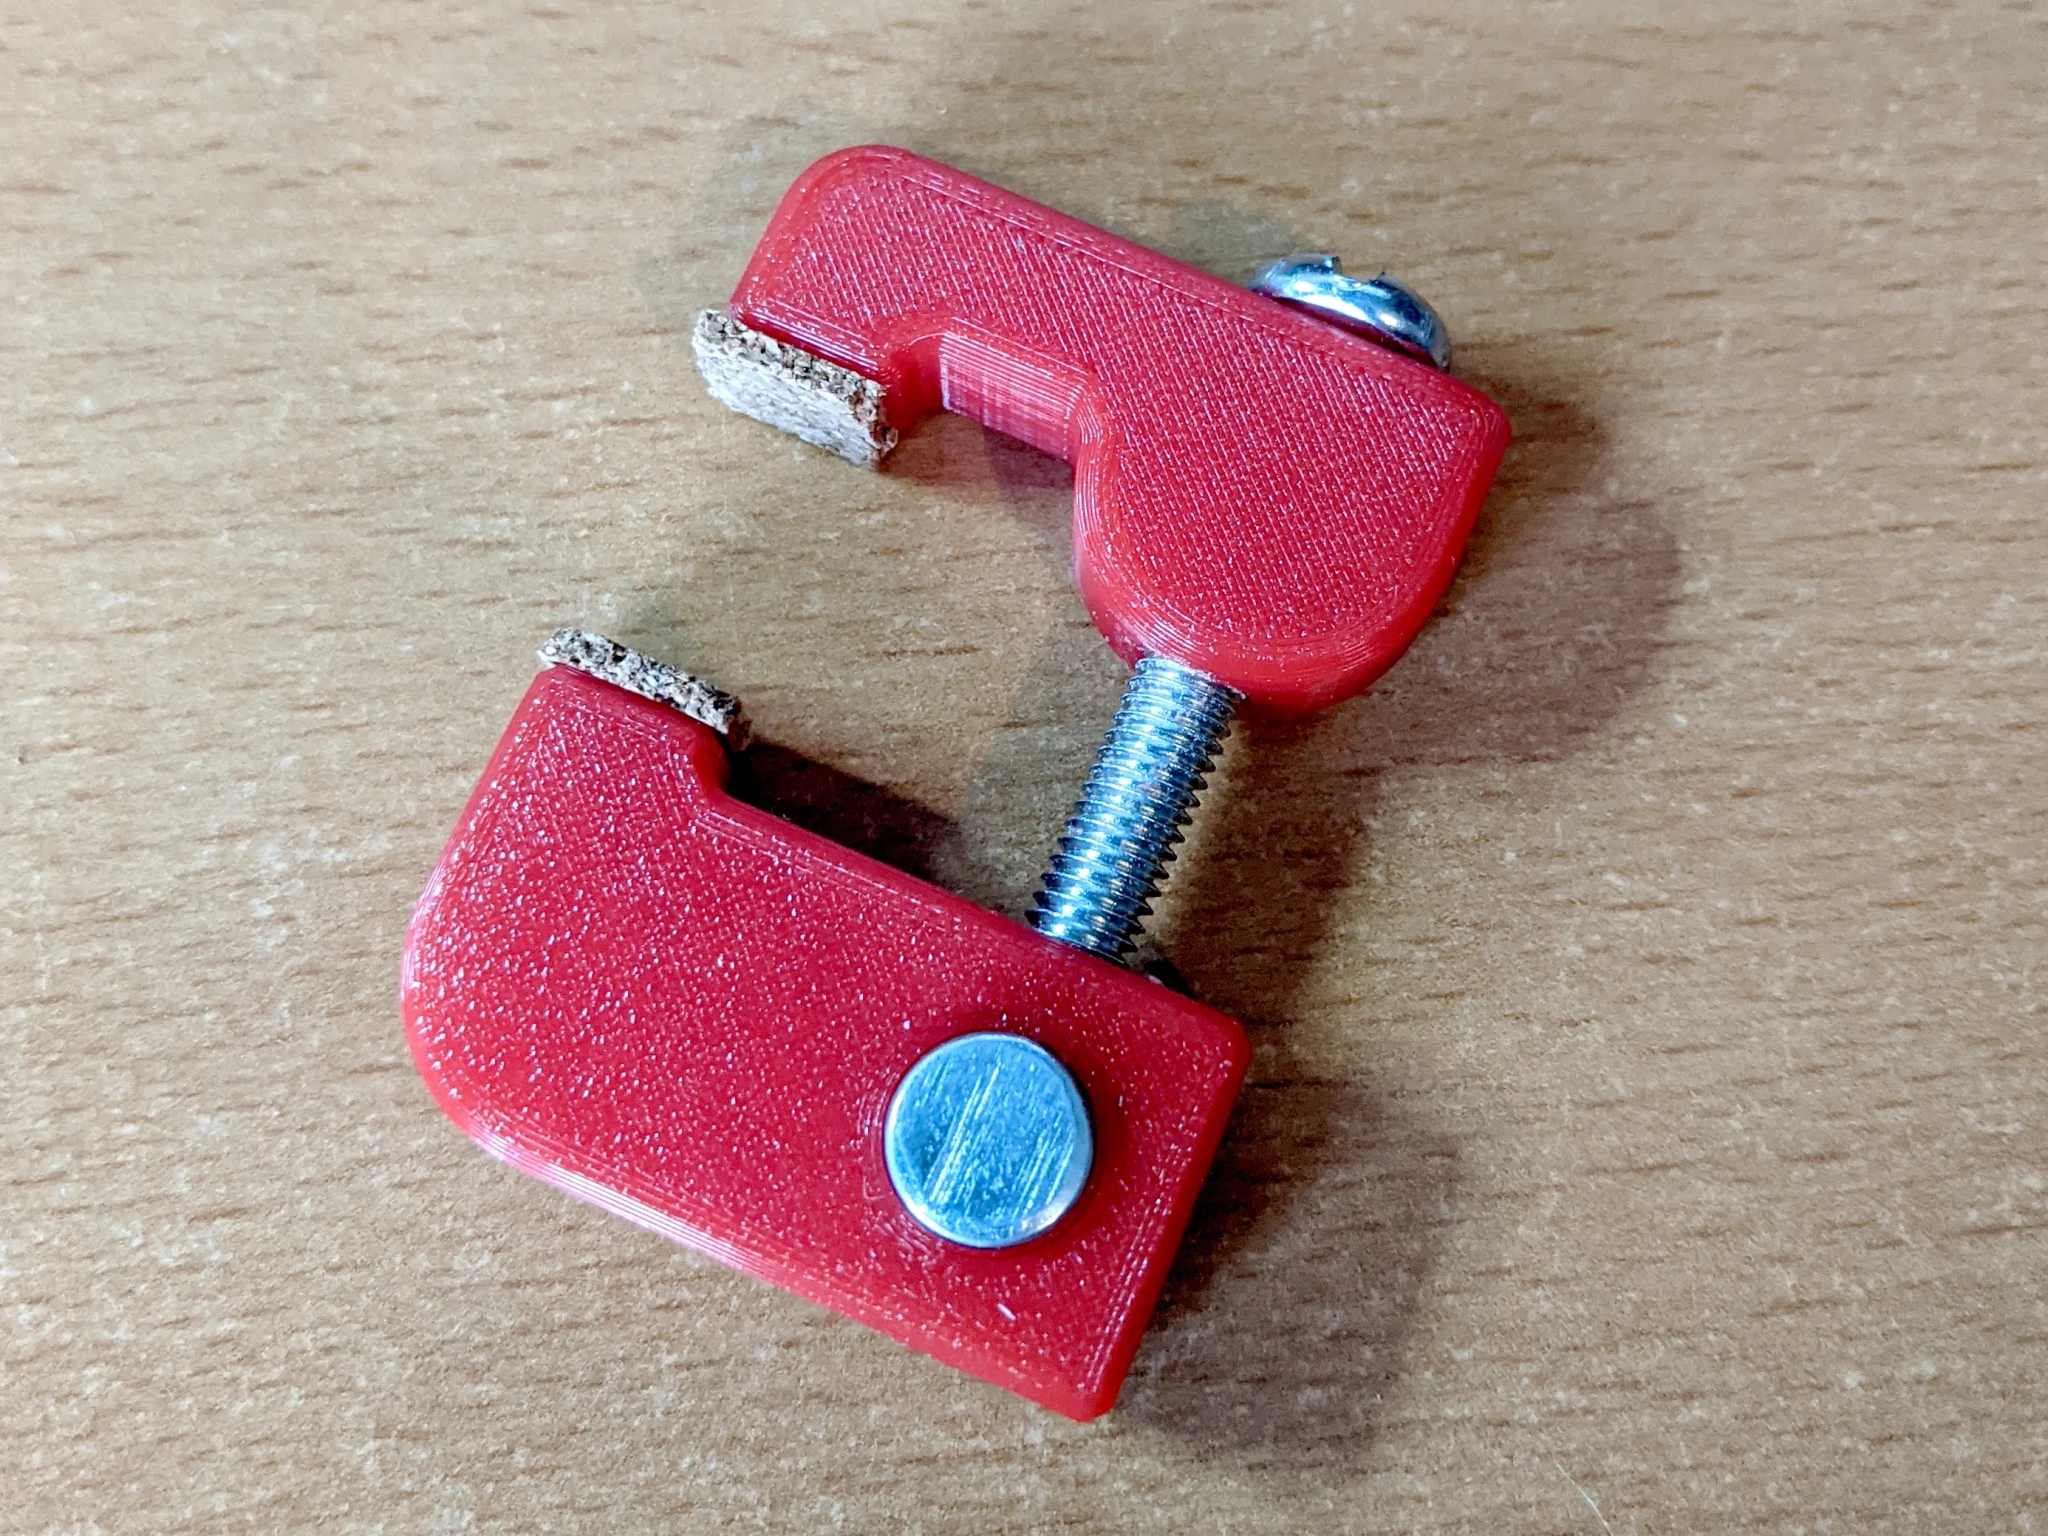
The custom clamp
I fit the clamp and tightened it, using a thick slice of sparkling wine cork to spread the force on the top and avoid damage. This established that the clamp was viable and could pull the crack closed.
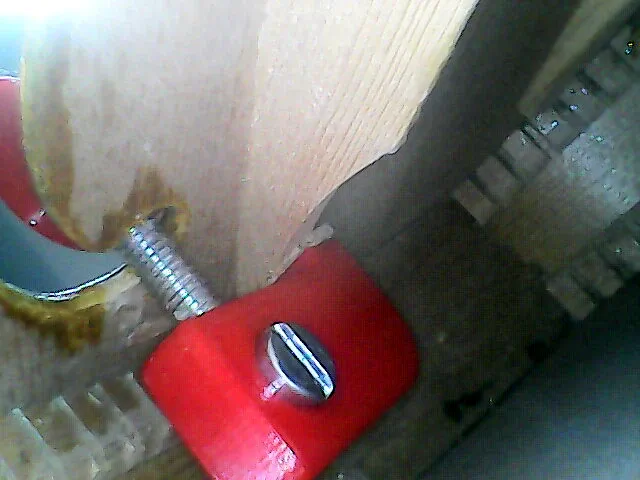
The brace, clamped in place
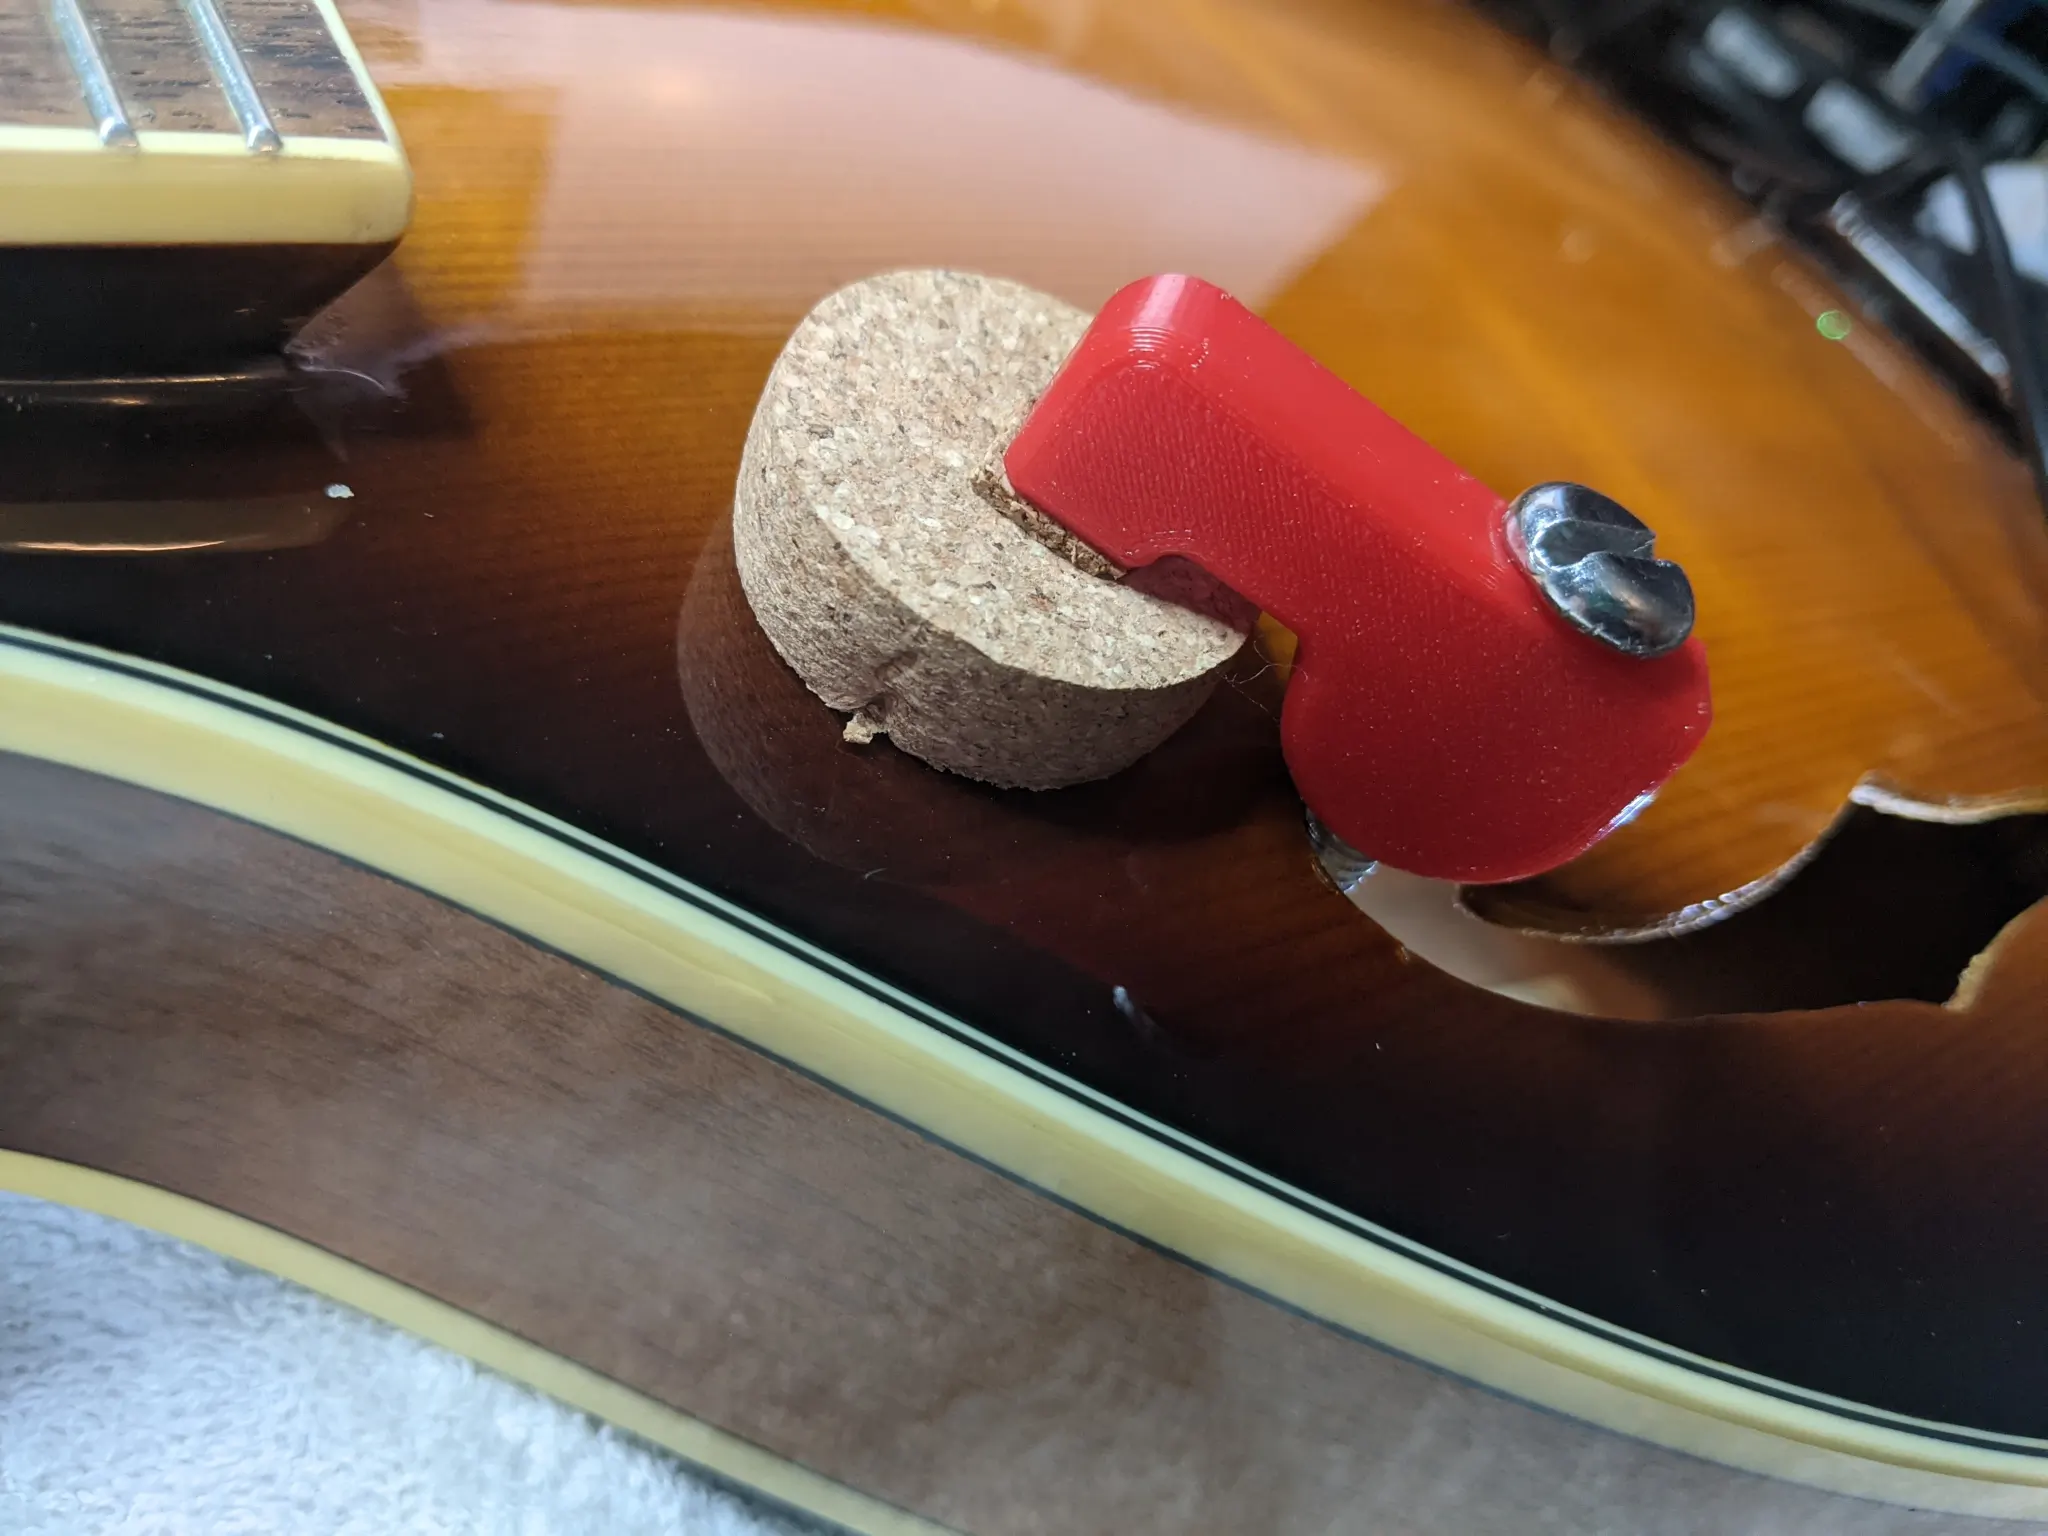
Outer view of clamp with cork protection disk
Now that I knew that I could clamp the brace, all that remained was to glue it. I used a length of silicone tubing, a syringe, a 3D-printed nozzle, and galvanised wire (intended for gardening) to construct an apparatus that would let me apply glue accurately inside the instrument. I used Titebond diulted with about 5% water to help it penetrate the gap better, and pulled and pushed on the top to work the glue into the crack.
When I was satisfied that I had enough glue in there, I applied my clamp, screwed it tight, and left it for 24 hours.
It seemed to be holding, so I went ahead with all the other jobs needed.
I drop-filled and polished out a couple of dings in the varnish. I levelled the (uneven) frets, crowned, rounded the ends, and polished them. I gave the instrument a good clean. I made a new nut, as the existing one was cracked. I took down the base of the bridge to enable a lower action. I sanded the inside of the f-holes to make their shape more even and to clean up some of the rough woodworking.
I was very nervous the first time I brought the strings up to pitch, but it held, and several days later it’s still doing fine. It’s very playable, and the action is low enough that I can keep a plectrum wedged between the strings and the frets. It might not be the loudest or best sounding instrument, but on its own, at home, it sounds very nice. And it looks good, too:
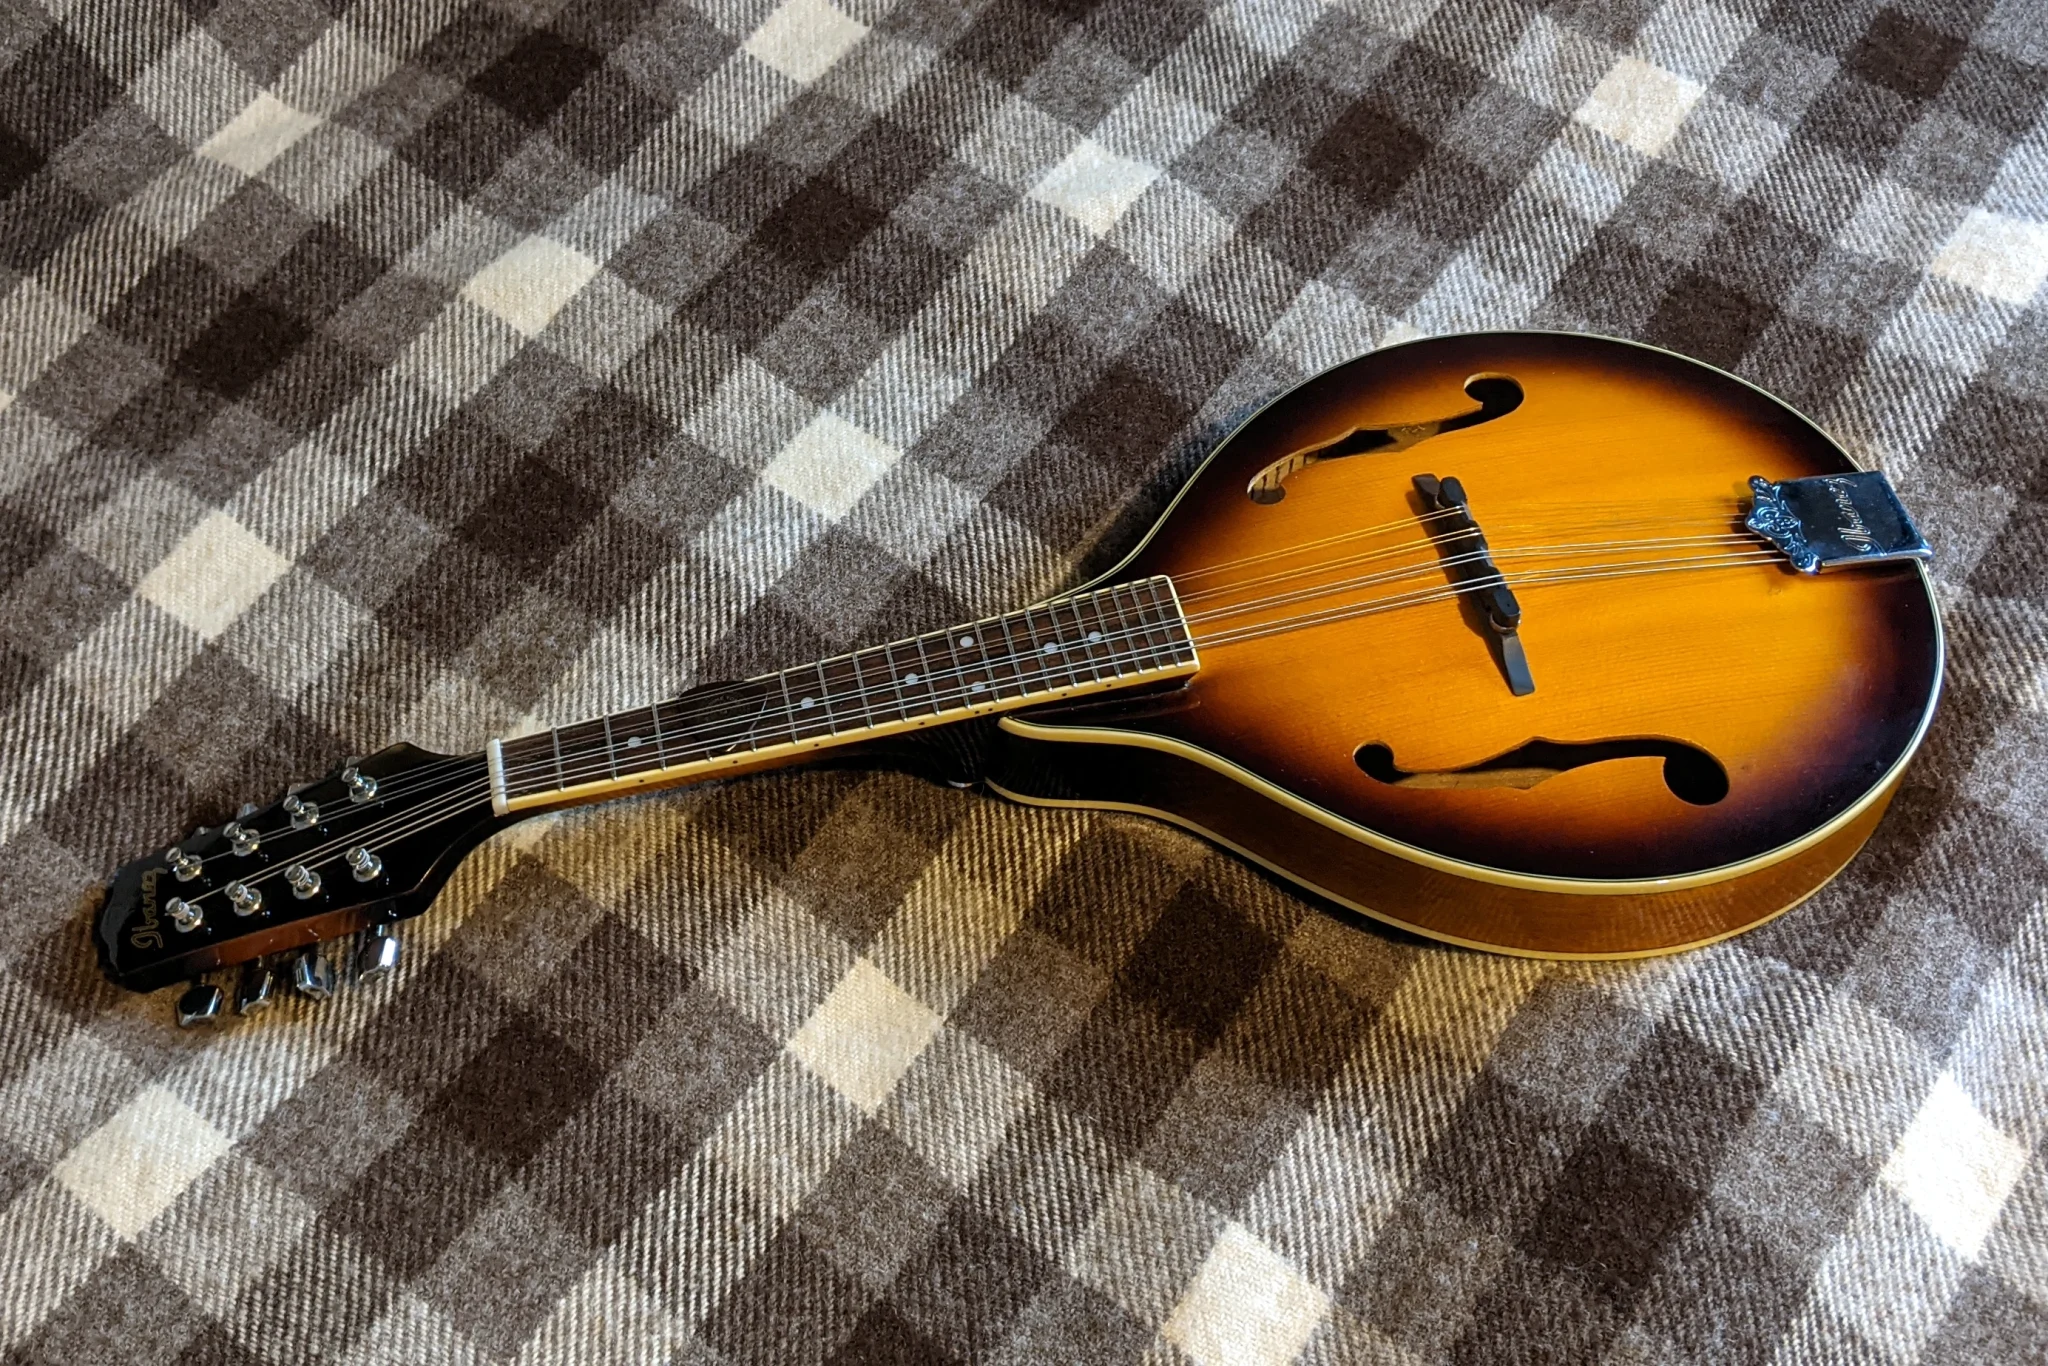
The restored mandolin
It was a fun project, and I’m delighted with the result.