Project Mustang: Turning Squier’s cheapest guitar into something great
As I wrote previously, I picked up a second-hand Squier Bullet Mustang guitar for £65 via Gumtree. It had a lot of promise, but it wasn’t achieving its potential. The fretwork was terrible (not level, sharp ends), the nut was too high, and the bright white single ply pickguard looked cheap and nasty. The bridge was too far back and not straight. The pickups were fine, but not stellar. So I improved it.
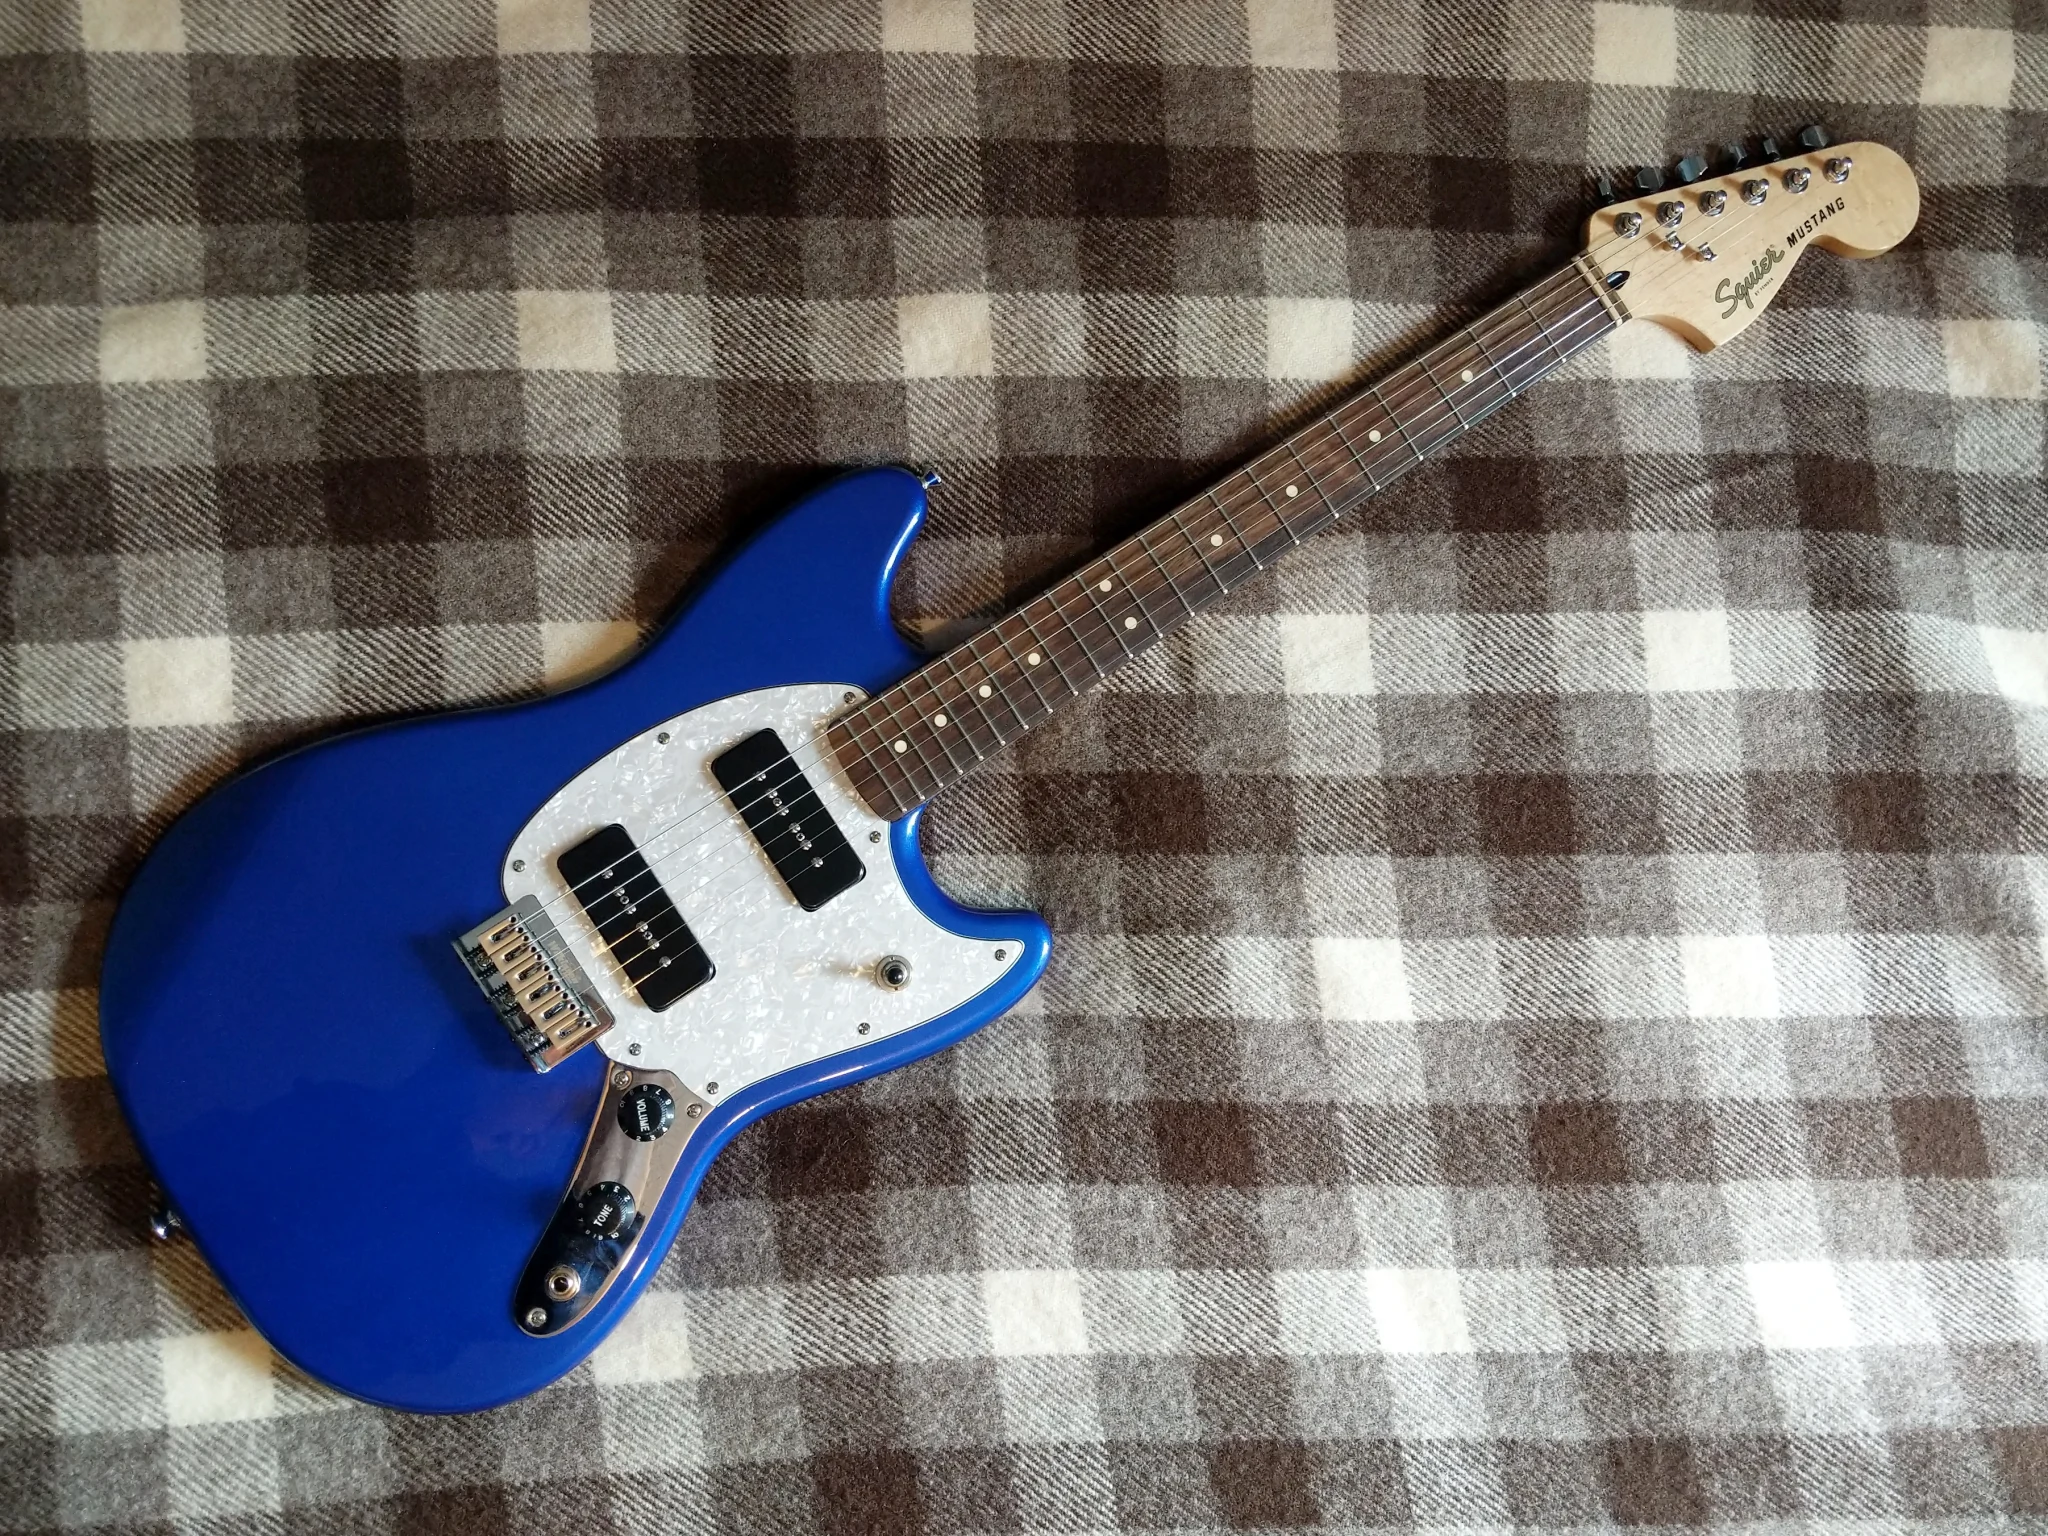
The finished Mustang
Here’s what I did:
- Stripped the pale satin varnish and refinished the neck with Tru-Oil
- Replaced the monochromatic headstock logo with a black and gold one from guitardecals.co.uk
- Replaced the stock ceramic humbuckers with Epiphone P-90 Pro pickups out of a Les Paul Special, which I scored cheap on eBay
- Installed 500 kohm CTS pots (which came with the P-90s)
- Added Strat-style knobs
- Put in a good quality Neutrik jack socket
- Installed a Wilkinson bridge, bought at a discount
- Drilled the body for through stringing
- Shielded the cavities with copper tape
- Installed a new scratchplate in ivory pearloid from earlpilanz on eBay, which I ordered without the bridge cut and fettled to fit the new, smaller bridge
- Levelled, crowned, and polished the frets, and rounded the ends
- Rolled the fingerboard edges
- Cut the nut slots to a more appropriate height
In order to get the copper tape to adhere, and to reduce the black smudges getting everywhere from the carbon paint, I painted the inside of the cavities with PVA glue and let it dry.
Although the body has a swimming pool rout, it was routed a few mm off centre and with a large enough corner radius that I had to rout the cavity a little larger to get the pickups to fit.
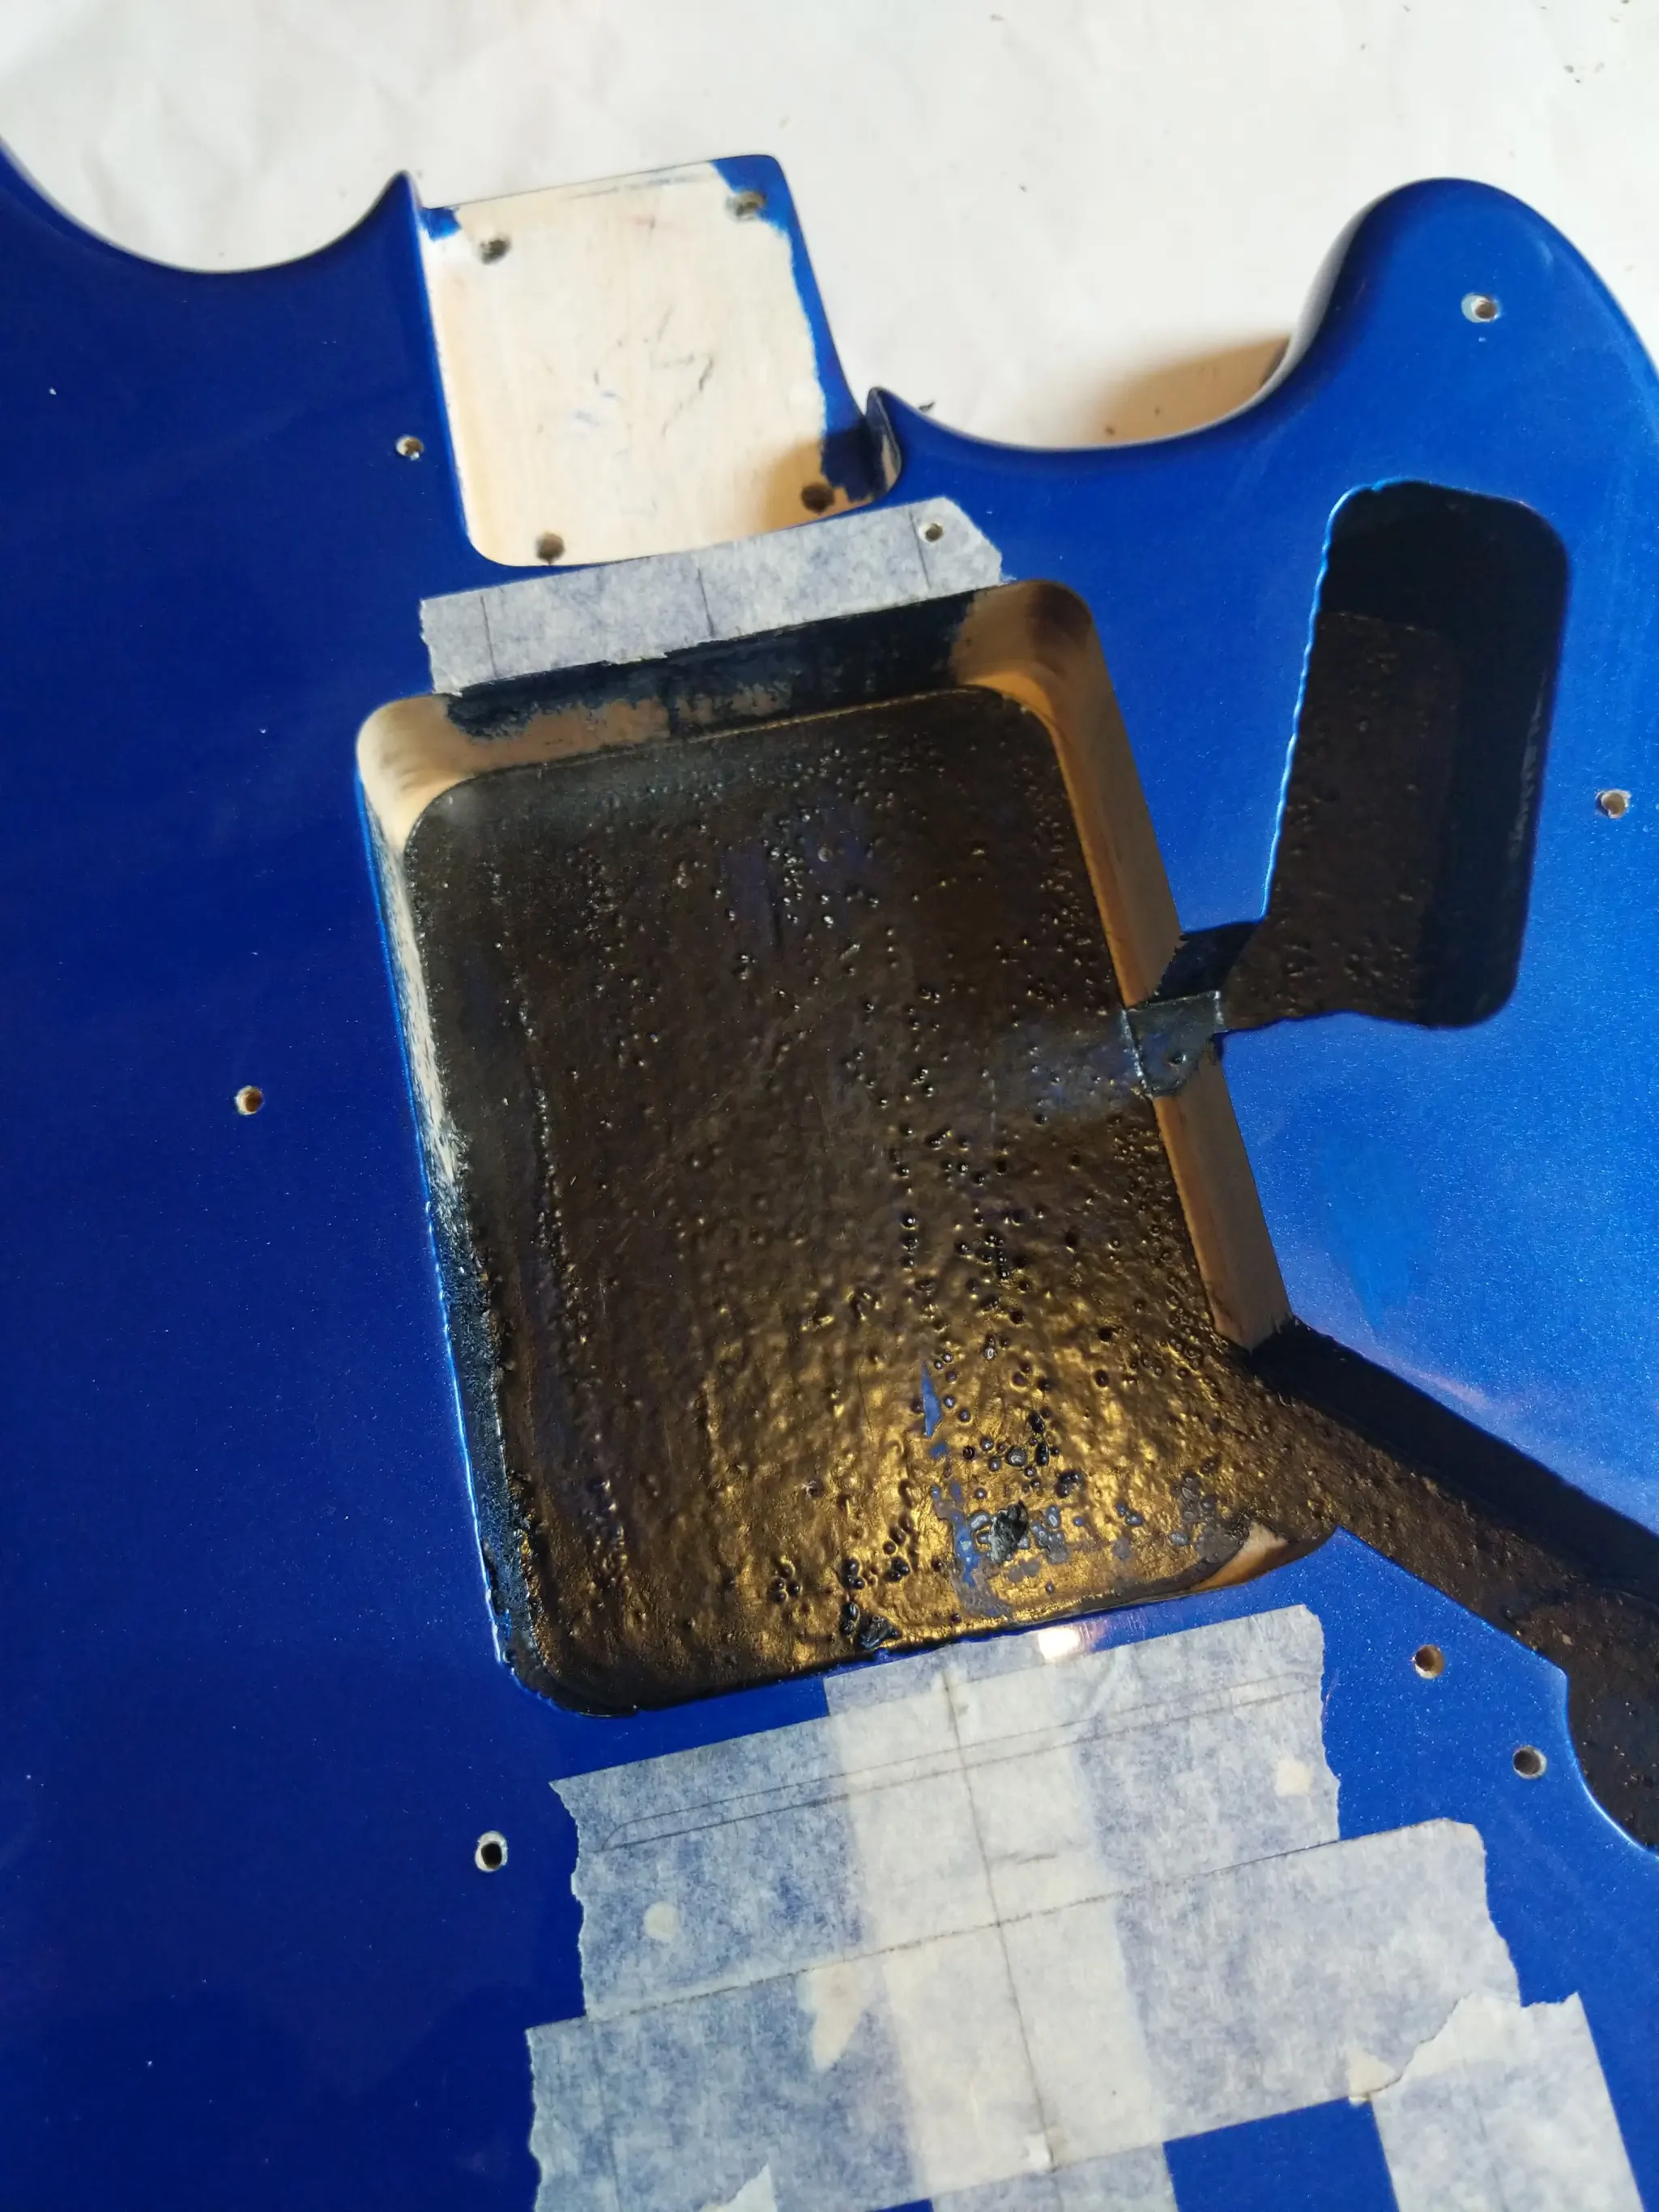
The enlarged pickup rout
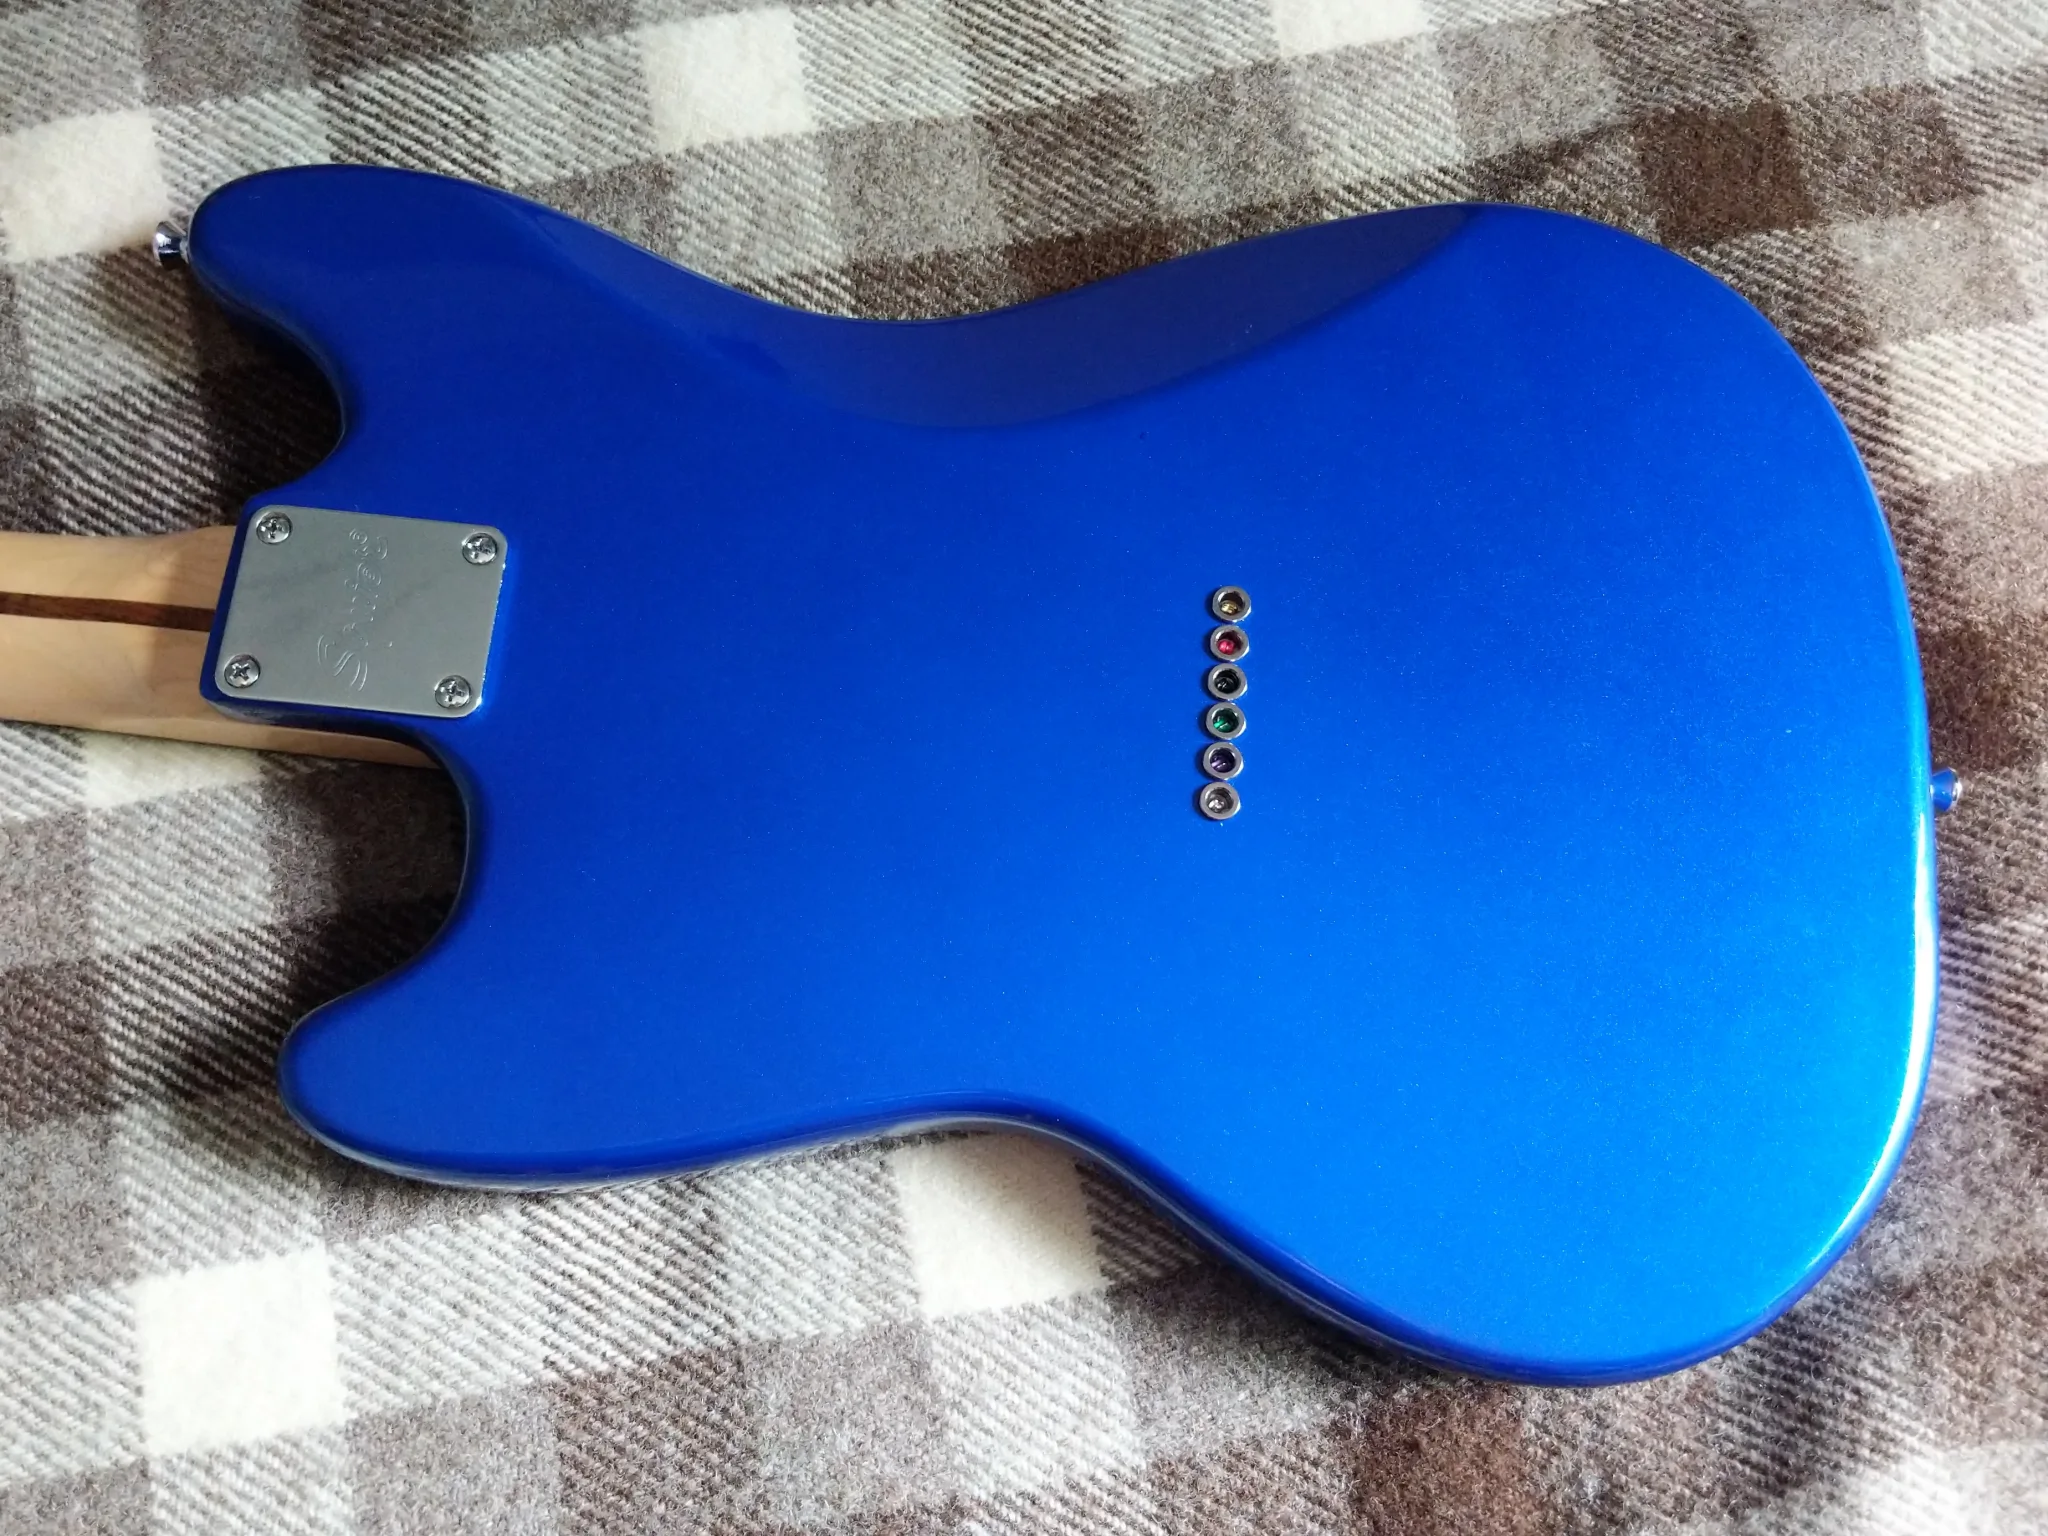
I had to plug the existing bridge holes to mount the new bridge in the correct place. This would be slightly visible behind the new bridge, so I took the body to the local branch of Superdrug, found a nail varnish in a perfect match (Aruba Blue by Essie) and they’re now invisible except under close scrutiny with a magnifying glass.

Can you spot the nail varnish?
I used a hand drill and couple of single use 3D printed jigs to drill the bridge and through-stringing holes. These were attached to the body using masking tape and superglue. Although plastic is relatively soft, it still provides enough guidance to ensure that the path of least resistance for the bit is centred and vertical:
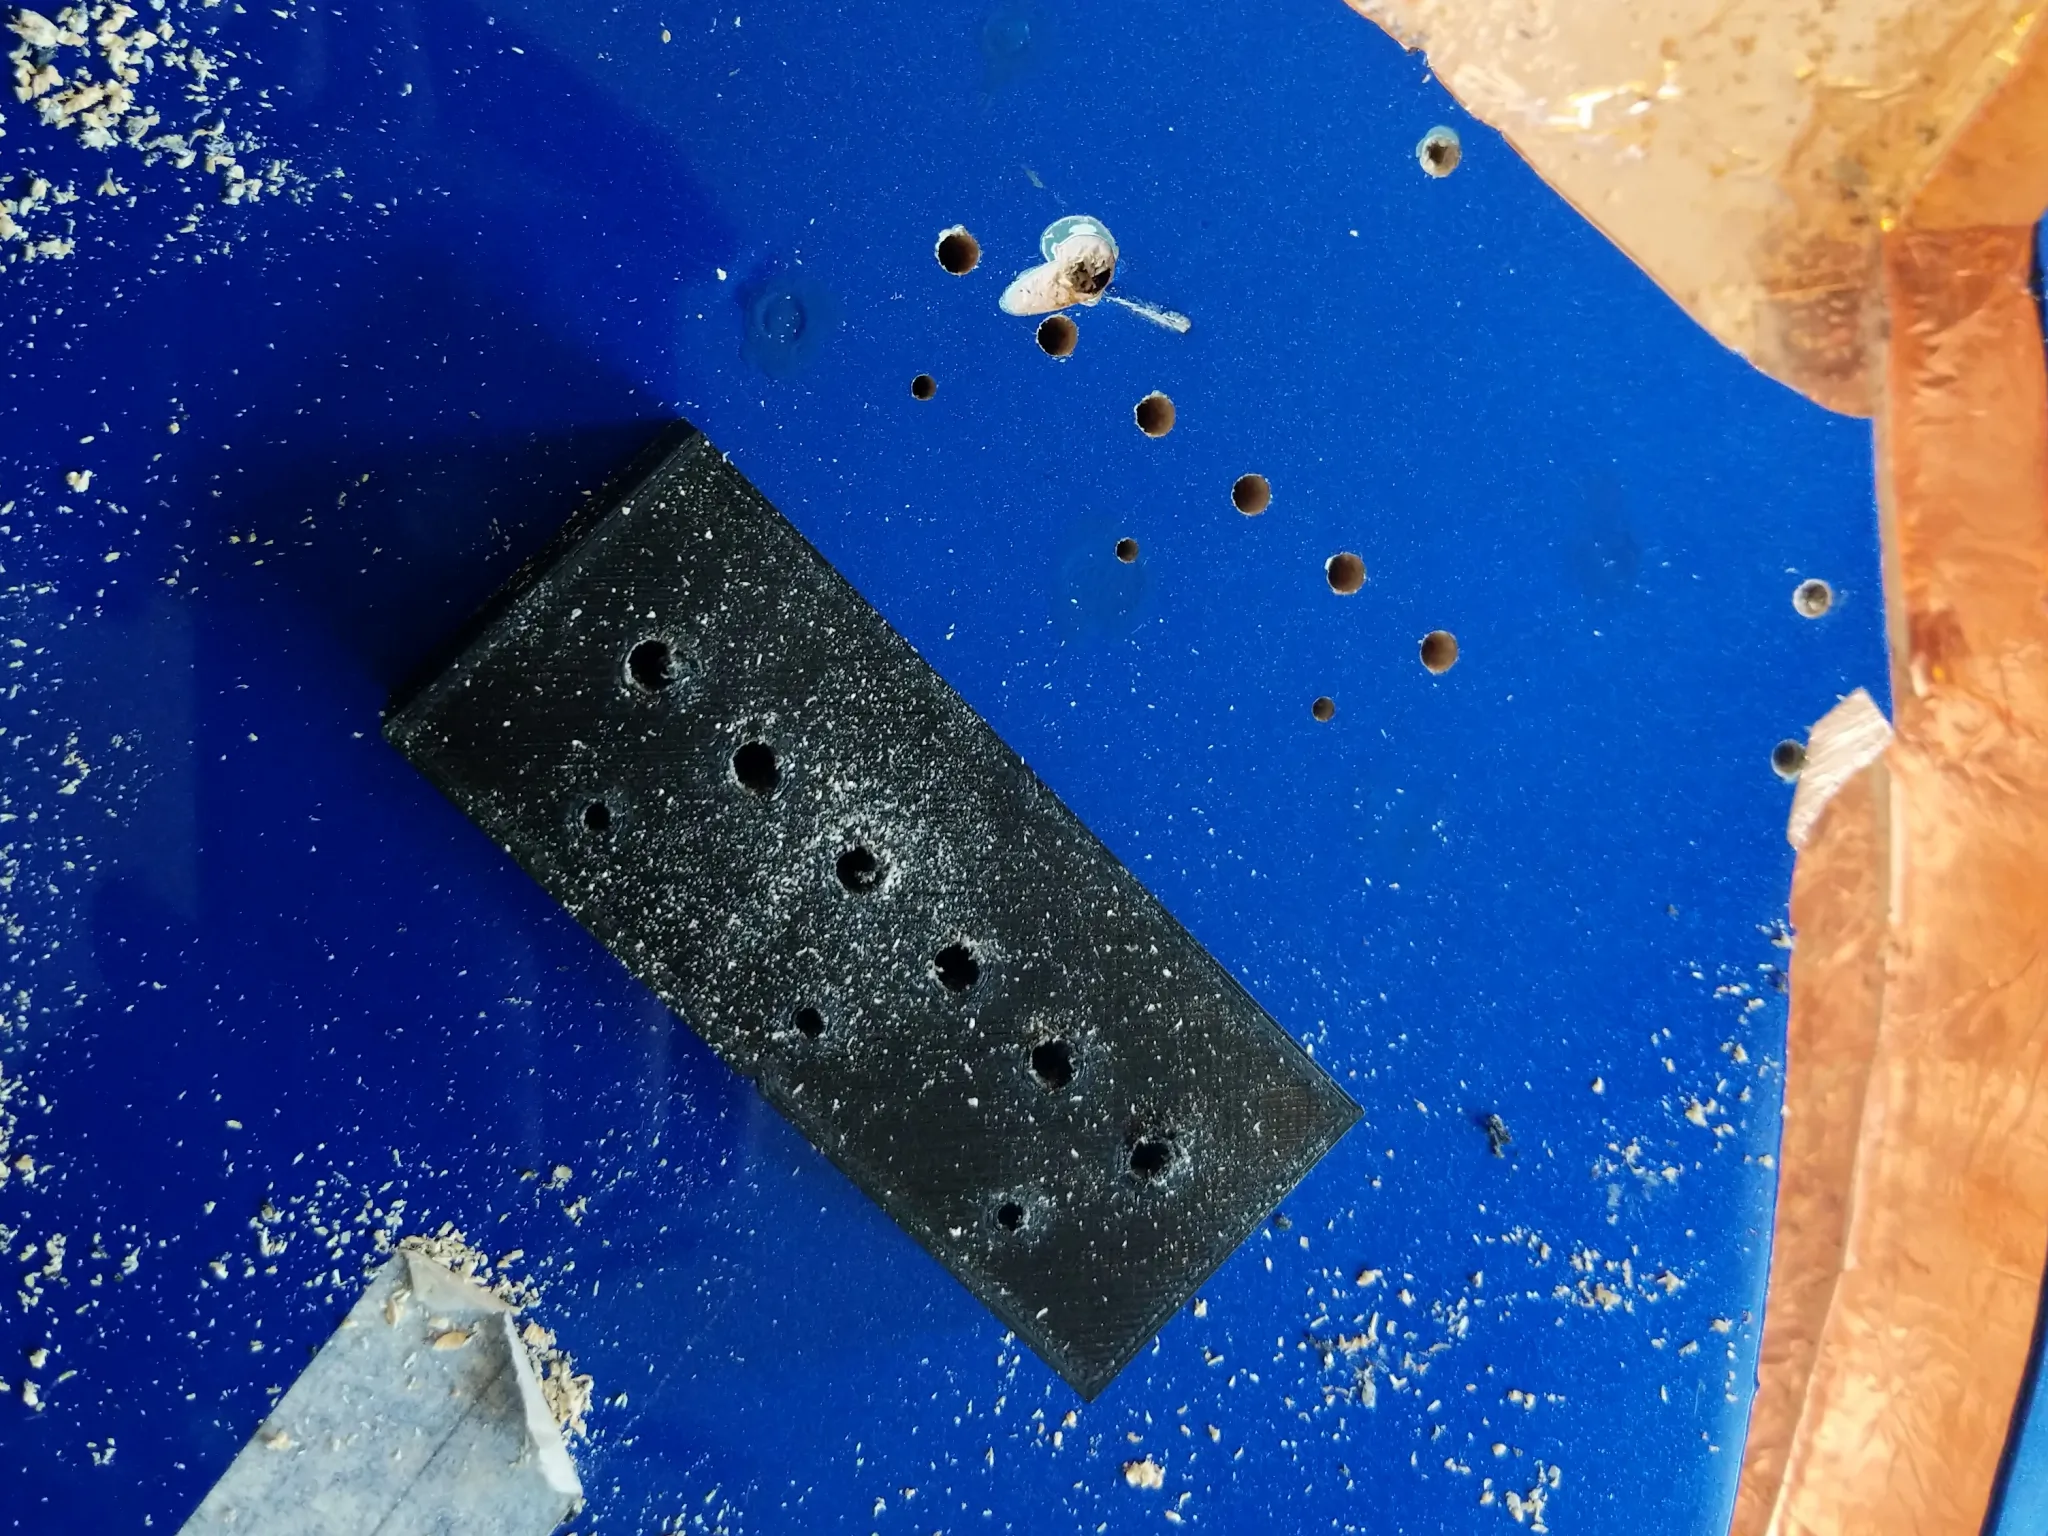
The bridge template next to the results
They said it couldn’t be done
The total cost, including the guitar, was about £150, or roughly what it would have cost new as the cheapest instrument in Squier’s range.
The change from a pure white pickguard to an off-white one sounds tiny, but it has a huge effect on how the blue is perceived. It looks much, much more attractive.
The light weight (2.9 kg), short scale, and contoured body are a joy. After all this work, it plays like a dream, sounds beautiful, looks fantastic, and it’s now my favourite guitar.