Analysing a MySQL database with JupyterLab and pandas
For work, I needed to run some analysis on a fairly large MySQL database of document metadata, to find information about the distribution of data, to visualise it, and to sample it for deeper manual investigation.
In the past, I’ve used R for at least some of this, but I’ve never used it often enough to properly internalise it, and it’s really hard to search on a single common Latin letter when you don’t know how something works.
This time, I decided to give Jupyter and pandas a try. JupyterLab is a richer and more attractive interface than a bare console, and I’m already familiar enough with Python to be productive instantly.
With the right libraries and configuration, it’s possible to pull the data from SQL queries right into the notebook and graph them there, without having to deal with intermediate exports of CSV (or TSV) files.
This puts all the work in one place and makes it documented and repeatable, which is extremely useful when someone comes back with a query or clarification.
However, none of the instructions in the posts I found that talked about running MySQL queries worked correctly any more, and I had to synthesise information from a number of sources to get it working. This post is to save you that effort.
The first step is to get JupyterLab running. The interface runs in a web browser with a Python server running in the background. If you already use Jupyter you can just install the remaining packages and skip ahead.
$ pip install jupyterlab pandas sqlalchemy matplotlib pymysql
in my case, I use asdf as a version manager for
everything (and I very much recommend it: you’ll never have to learn another
language-specific version system again), so I also had to run asdf reshim
python to make the command available in my path. You might require a different
kind of faffing to make pip-installed commands available if you haven’t done
so before.
Start up the server, and tell it not to bother trying to open a browser, because it won’t work without authentication:
$ jupyter-lab --no-browser
In another shell, find the URL that will allow you to connect without fussing with accounts:
$ jupyter server list
This will look something like:
[JupyterServerListApp] Currently running servers:
[JupyterServerListApp] http://localhost:8888/?token=TOKENHERE :: /home/you/blah
Open that link and you’ll see Jupyter Lab. Start a new Python 3 notebook and
import the packages you’ll need: pandas for data analysis, and pymysql
masquerading as MySQLdb so that pandas can use sqlalchemy to connect
to the database:
import pandas as pd
import pymysql
pymysql.install_as_MySQLdb()
For the connection, you can use a database connection URI. (You might want to read this from an environment variable or a file to avoid putting it into the notebook directly.)
conn = 'mysql://user:[email protected]:3306/database'
Now you can read from the database straight into a data frame:
df = pd.read_sql_query('SELECT pages FROM documents', con = conn)
And from there, you can do anything that a data frame supports. For example, make a histogram of the number of pages from a set of documents, but only where there are ten or fewer pages:
df[df['pages'] <= 10]['pages'].hist()
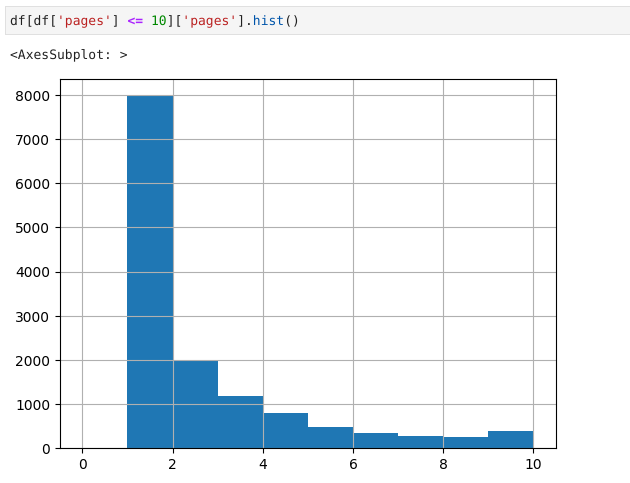
The histogram from the query above
Or save a sample of 1000 entries to a CSV file:
df.sample(1000).to_csv('sample.csv')
Find the mean or median number of pages:
df['pages'].mean()
df['pages'].median()
And, of course, do all the more sophisticated things that you can do with pandas.
This is all adaptable to other databases too, but I haven’t tried yet.